Whether you’re planning to stain your cabinets or repaint them for a new look, sanding is an important first step. Learn how to sand properly using the proper grit and avoid damaging your cabinets.
Sanding is time-consuming, but it’s necessary to achieve professional-looking results. For a quicker update, consider choosing ready-to-paint or pre-primed cabinet components that skip the sanding process altogether. Visit Cabinet Refinishing Sacramento for more details.
Sanding
The surface of the cabinet boxes and doors needs to be sanded down to provide a smooth base for the new stain or paint. This step is crucial to getting a long-lasting finish.
A light sanding removes dirt, grime, and any layers of paint or stain. It also helps to prep the surface for further work. This is one of the most important parts of any refinishing project, so it’s worth taking your time to do it right.
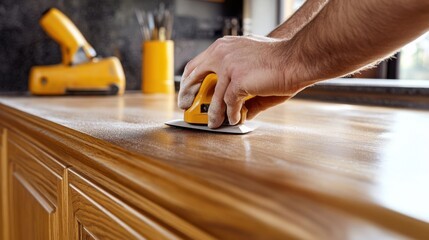
If you’re sanding wood cabinets, start with a medium grit sandpaper to get rid of rough spots and old finishes. Then, switch to a finer sandpaper to smooth the surfaces down. Be sure to always sand in the direction of the grain.
For more difficult to reach areas, invest in a power sander and a sanding block. The extra effort pays off by saving you a ton of time and ensuring a professional-looking result.
When sanding, make sure you use a mask to protect yourself from harmful dust and fumes. It’s a good idea to sand in a well-ventilated area with good air flow. A vacuum cleaner is also useful to remove any stray dust particles from the workspace.
Before you begin sanding, make sure your tools are clean and organized. Keeping your supplies together prevents you from searching for the right tool at a later stage. It’s also helpful to have a checklist of all the steps so you can stay on track.
If you’re sanding cabinets with a decorative surface, such as grooves or decorative drawer fronts, consider investing in a detail sander to get into tight spaces and hard-to-reach corners. This makes it easier to get into all the little details and achieve a flawless finished result.
After sanding, it’s important to wipe down the cabinets with a degreaser to remove any oils or residues that could interfere with adhesion. A mild dishwashing liquid works best, but for tougher residues you can use a stronger solvent like trisodium phosphate (TSP). This also helps to prevent future problems with the paint or stain.
Stripping
A new coat of paint will not adhere properly to existing layers without sanding. Skipping this step can lead to flaking and chipping down the line, as well as uneven results that are not as polished and professional-looking. It is important that cabinet refinishing professionals understand how to strip and sand cabinets effectively. This step is essential to a quality finish, and it should not be rushed through to save time or money.
When the sanding and stripping process is completed, your cabinets will be ready for stain or painting. This step can be intimidating for first-time DIYers, but it is crucial for achieving the best results. When done correctly, this stage will ensure that your finished product looks great and lasts for years to come.
Before sanding, it is important to remove all hardware and cover any exposed surfaces with plastic and tape to protect them from the dust created by the sanding process. Then, you should carefully label each cabinet door and drawer to make reassembly easier later on. After sanding, you should clean the cabinets thoroughly with a mild cleaner and degreaser to remove any dirt or grease that may be present on the surface.
There are many methods for stripping paint from cabinets, but not all are created equal. The wrong approach could damage your cabinets or leave behind gouges and holes in the wood that can be very difficult to repair. The most effective method for removing old paint and preparing the cabinets for stain is to use chemical strippers. These powerful solvents break down the bond between the surface and the paint, allowing it to be scraped or washed away easily.
It is also possible to sand by hand, though this is more labor-intensive and can result in less uniform results. For manual sanding, you can use sanding sponges to get into nooks and crannies or use an electric detail sander to reach more intricate areas of the cabinet. It is also a good idea to keep several different sanding grits on hand so that you can gradually work your way down to a smooth, level surface. Once you’ve finished sanding, it is a good idea to use a shop vac or tack cloth to remove any remaining sanding dust from the cabinets.
Primer
The right primer is a game-changer for your cabinetry. It ensures that your new paint job withstands daily wear and tear and resists moisture and peeling over time. It also allows your color to come to life and holds it beautifully. Even if your cabinets are in great shape with no deep scratches or other imperfections, this step is essential.
When choosing a primer for your cabinets, be sure to pick one that’s designed specifically for use with your chosen finish. For example, if you’re going with Advance paint from The Cabinet Door Store, we recommend using Fresh Start High-Hiding Primer as it provides maximum hiding power and is water-resistant. It’s the same primer used by professional painters to ensure that their work is vibrant and enduring.
For best results, apply the primer in thin coats going with the direction of the wood grain. Be sure to wait at least an hour between each coat. Light sanding between each coat is recommended for a smooth, flawless finish.
Sanding cabinets can produce a lot of dust particles, so be sure to wear protective gear like safety goggles and a dust mask. You’ll also want to protect the surrounding areas with plastic and tape, including the interiors of your cabinet boxes and backsplashes.
Before beginning the sanding process, make a labeled staging area for each set of cabinet doors and drawers to help you keep track of them as you remove them for painting. We suggest setting up your workstation in a well-ventilated room with plenty of lighting to make the job as easy as possible for you and your family members.
Once you’ve finished sanding, begin the finishing process by applying a high-quality oil-based polyurethane to your cabinets. Then, let the finish dry and apply a second coat for an enduring finish that will resist moisture and peeling.
Topcoat
Cabinet refinishing is an affordable way to give your home’s cabinets a facelift. It differs from other renovation methods, such as refacing or replacing, because it only affects the exterior surfaces of your cabinets and does not change the structural integrity. This makes refinishing ideal for homeowners who want to update their kitchen without spending a fortune.
Before the refinishing process begins, it’s important to remove all hardware from your cabinets and store it for later if you plan on reusing it. This will ensure that the surface is completely clean and ready for the new finish, preventing damage from reinstalling the hardware. It is also recommended to use a degreaser such as trisodium phosphate to eliminate any grease or food residue on the surfaces.
Once the cabinets are dry, they can be sanded again to create a smooth base for the topcoat. This is an excellent opportunity to repair any scratches or dents, and it will help the finished product last longer. It’s also a good idea to lightly scuff-sand the primed surfaces to promote topcoat adhesion and remove minor imperfections.
After sanding, the surfaces can be vacuumed and tack-raped to remove any dust particles that may have accumulated. This is an excellent time to caulk any cracks where the cabinets meet walls or crown molding. This will provide a professional finish and prevent water and moisture from leaking into the cabinets in the future.
When it’s time to apply the topcoat, it is important to work in a well-ventilated area. Avoid using harsh chemicals, as these can strip the finish and cause it to dull or discolor over time. If you’re concerned about odors, you can opt for low-odor primer and paint that is formulated to be non-toxic.
If you’re unsure about how to proceed with your cabinet refinishing project, it’s always best to consult with a professional. They can assist with the entire process and provide expert advice to ensure your cabinets look their best. They can even make recommendations for the right materials to use, such as a gel stain. These stains are thicker than traditional stains and sit on the surface rather than soaking in, making them ideal for delicate material such as painted or laminated wood.